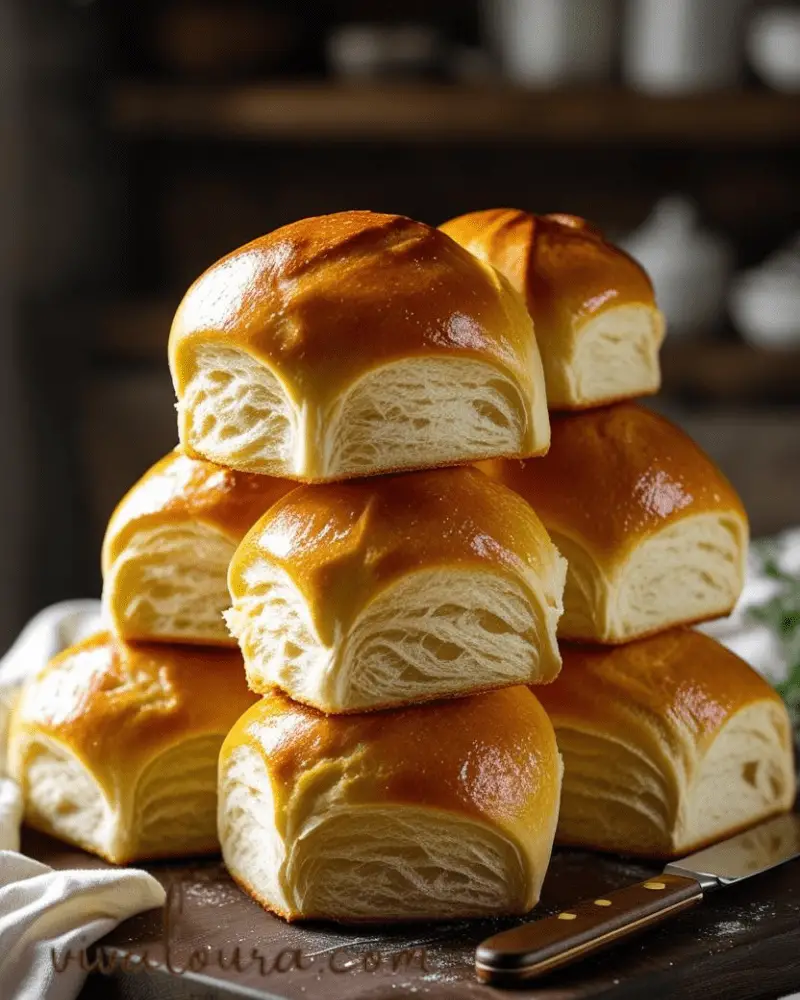
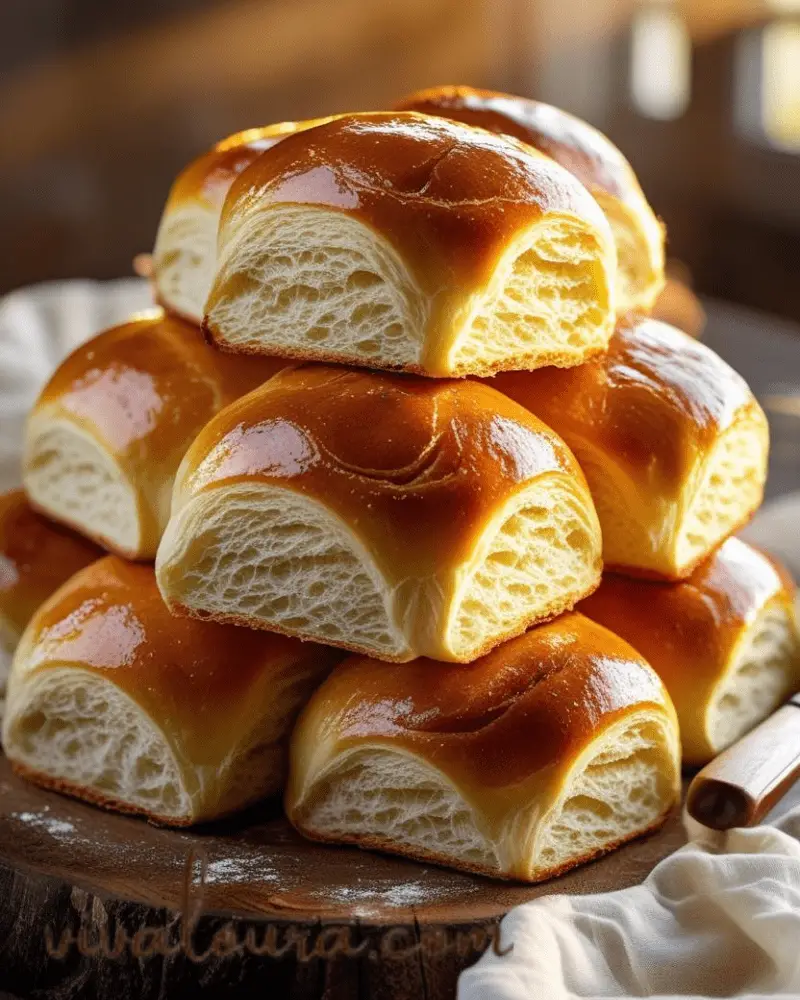
Homemade Brioche Buns
Brioche buns are a traditional French pastry, famous for being extremely rich, tender, and buttery. Unlike everyday bread, brioche is enriched with a generous quantity of butter and eggs, which gives it a slightly golden color and a melt-in-your-mouth texture. They’re an excellent all-rounder, suitable for everything from gourmet burgers and pulled pork sandwiches to a lovely accompaniment with jam or simply enjoyed on their own. Although they may look daunting to produce, this recipe takes the process step by step through easy, manageable steps so you can achieve ideal, plush homemade brioche buns each time.
Equipment you’ll need
(Click on the equipment names below to view 🛒.)
- Stand mixer with a dough hook attachment (highly recommended for kneading)
- Large mixing bowl
- Small bowls for ingredients
- Measuring cups
- Measuring spoons
- Kitchen Scale (for precise measurements, especially for flour)
- Plastic wrap or a clean kitchen towel
- Baking sheets
- Parchment paper
- Pastry brush
Ingredients
For dough:
- Warm Milk: 1/2 cup (120 ml) (around 105°F/40°C)
- Active Dry Yeast: 2 1/4 teaspoons (one standard packet)
- Granulated Sugar: 1/4 cup + 2 tablespoons (85g)
- Large Eggs: 3, at room temperature
- All-Purpose Flour: 3 1/2 cups (420g), plus more for dusting
- Salt: 1 teaspoon
- Unsalted Butter: 12 tablespoons (1 1/2 sticks / 170g), very soft but not melted, cut into 1-inch pieces
For egg wash:
- Large Egg: 1
- Water or Milk: 1 tablespoon
Instructions
Step 1: Activate the Yeast
- In the bowl of your stand mixer, combine the warm milk, yeast, and 1 tablespoon of the granulated sugar.
- Stir gently and let it sit for 5-10 minutes, or until the mixture becomes foamy. This indicates that your yeast is active.
Step 2: Combine Wet Ingredients
- Add the remaining granulated sugar and the 3 large eggs to the yeast mixture. Whisk gently to combine.
Step 3: Add Dry Ingredients
- Attach the dough hook to your stand mixer.
- Now add the flour and salt to the wet ingredients in the mixer bowl.
- Mix on low speed for 2-3 minutes until a shaggy dough forms and all the flour is incorporated. The dough will be sticky.
Step 4: Knead the Dough (The Butter Incorporation)
- Increase the mixer speed to medium-low.
- Begin adding the very soft butter pieces, one piece at a time, allowing each piece to be fully incorporated before adding the next. This process will take about 10-15 minutes.
- Once all the butter is added, continue kneading the dough on medium speed for another 10-15 minutes. The dough will transform from sticky to smooth, elastic, and glossy. It should pull away from the sides of the bowl.
- Tip: To check if it’s ready, perform the “windowpane test.” Pinch off a small piece of dough and gently stretch it. If you can stretch it thin enough to see light through it without tearing, it’s ready.
Step 5: First Rise (Bulk Fermentation)
- Lightly grease a large bowl.
- Transfer the kneaded brioche dough to the greased bowl.
- Cover the bowl tightly with plastic wrap or a clean kitchen towel.
- Place the bowl in a warm place (or the refrigerator) for the first rise.
- Warm Place (Faster Rise): Let it rise at room temperature for 1.5-2 hours, or until doubled in size.
- Refrigerator (Slower, Better Flavor): For best flavor and easier handling, refrigerate the dough for at least 8 hours or overnight (up to 24 hours). The cold temperature slows down the fermentation, developing more complex flavors. It will still rise, just slower.
Step 6: Shape the Buns
- Lightly flour your work surface.
- Gently punch down the risen dough to release the air.
- Divide the dough into 8-12 equal pieces (depending on your desired bun size). For standard burger buns, 8 pieces usually works well.
- Take each piece and shape it into a smooth, round ball. To do this, pull the edges of the dough under itself and pinch to seal, then cup your hand over the dough ball and rotate it on your work surface until a smooth, taut top forms.
- Line two baking sheets with parchment paper, place the shaped buns on the prepared baking sheets, leaving about 2-3 inches of space between them, as they will expand.
Step 7: Second Rise (Proofing)
- Loosely cover the shaped buns with plastic wrap or a clean kitchen towel.
- Let the buns rise in a warm place for 45-60 minutes, or until they are visibly puffy and nearly doubled in size. This is the final proof.
- Preheat Oven: About 20 minutes before the end of the second rise, preheat your oven to 375°F (190°C).
Step 8: Egg Wash and Bake
- In a small bowl, whisk together the egg and water (or milk) for the egg wash.
- Gently brush the tops of the risen brioche buns with the egg wash. This will give them a beautiful golden-brown, shiny crust.
- Bake the buns in the preheated oven for 15-20 minutes, or until they are deeply golden brown on top and sound hollow when tapped on the bottom.
- Tip: If the tops are browning too quickly, you can loosely tent them with aluminum foil.
Step 9: Cool
- Remove the brioche buns from the oven and transfer them to a wire rack immediately.
- Let them cool completely before slicing or serving. This allows the internal structure to set properly.
Tips for Success
- Work with Room Temperature Ingredients: Particularly the eggs and butter, this ensures that they are able to integrate nicely into the dough.
- Don’t Rush the Kneading: The extensive kneading time is important in developing the gluten and integrating all that butter, producing the characteristic brioche texture.
- Don’t Over-Flour: Avoid the temptation to add excessive amounts of extra flour when kneading or shaping. Brioche dough is typically slightly sticky.
- Cold Dough is Easier to Handle: If you find stickiness a problem while shaping, put the dough in the fridge for 30 minutes.
- Top Your Buns: For extra flavor and texture, sprinkle sesame seeds, poppy seeds, or flaky sea salt on top of your buns before baking.
- Storage: Keep brioche buns in a covered container at room temperature for 2-3 days, or freeze for 2 months. Reheat in the microwave or oven gently to remain fresh. Enjoy your delicious homemade brioche buns! They’re sure to elevate any meal.
Frequently Asked Questions (FAQs)
Q1: Is it possible to make brioche dough without a mixer?
Yes, but it will involve hard hand kneading for 20-25 minutes because of the high butter content.
Q2: How do I keep homemade brioche buns fresh?
Store in a covered container at room temperature for up to 3 days or freeze for up to 2 months.
Q3: Do I have the option to use instant yeast?
Yes, simply omit the activation and add it directly to the flour.
Homemade brioche buns are best served with
- Grilled Chicken Burgers
- Egg Salad Sandwiches
- Breakfast Sausage & Egg Sliders
Conclusion
There’s no substitute for the joy of baking your own brioche buns from the ground up—soft, rich, golden, and irresistibly airy. Whether you’re using them for juicy burgers, fancy sandwiches, or just snacking with a pat of butter, these homemade buns take every bite to the next level. With a little patience, you can achieve bakery-quality results straight from your kitchen. Try them out and see the difference for yourself—your taste buds will be grateful!
Delicious Homemade Brioche Buns: An Easy Recipe
Ingredients
Equipment